
This manual explains how to enter Green Grading information and review them online.
Using Sensorial sessions is available for the following products:
- Roast: All tiers
- Commerce
- Origin: All tiers
Creating a Physical Analysis
In the Physical subsection you can measure and log the following for samples and green lots:
- Moisture
- Density
- Water Activity
- Defects*
- Screen size
- Milling difference
- And more!
*Defect logging is not available on Foundation packages.
There are different ways to create a session
- Via the Physical Analysis overview page
- Via the Samples or Green Inventory page
- Via the lot's page
- Via the Dashboard
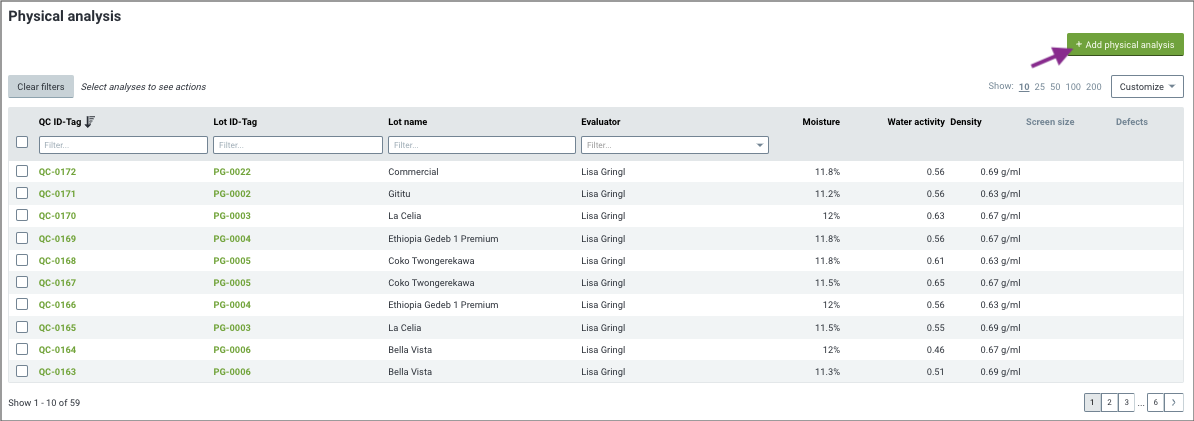
Via the Physical Analysis overview page
- Log into the online platform C-sar.
- Navigate to Quality > Physical on the main menu bar.
- You will be directed to the Physical Analysis overview page.
- Click + Add physical analysis to create a new Physical Analysis.
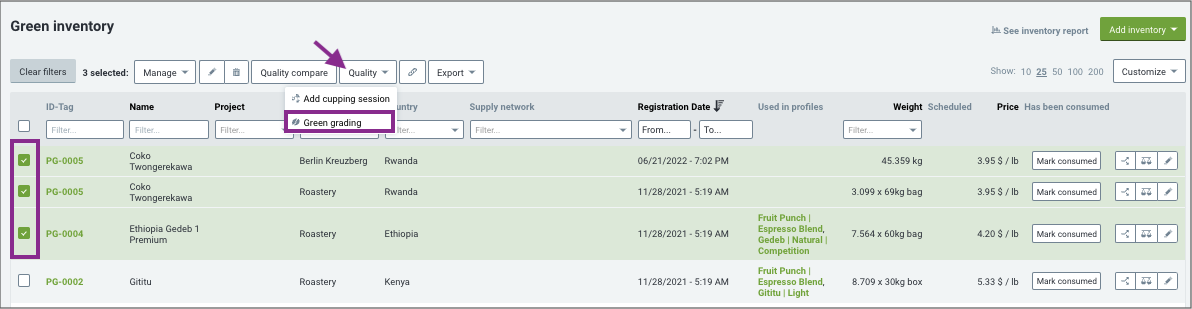
Via the Samples or Green Inventory page
- Log into the online platform C-sar.
- Go either to the Samples or Green Inventory overview page, depending on the type of lot for which you want to add physical information.
- Check the box next to the lots you want to add the information to.
- A menu bar at the top of the table appears. Click Quality > Green grading.
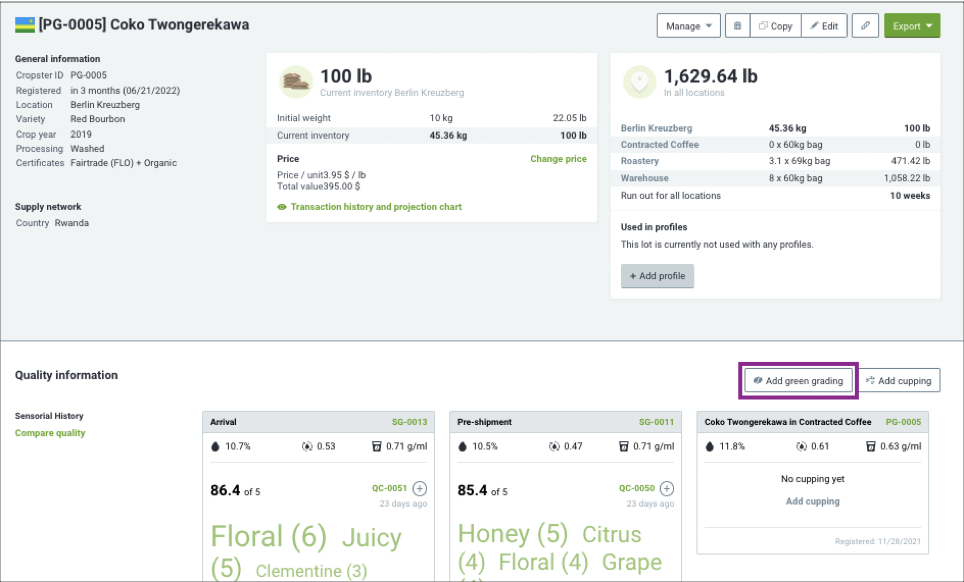
Via the lot's page
- Go to the lot's detail page by clicking on the referring SG- or PG-number.
- Scroll down to the Quality section and click Add green grading button.
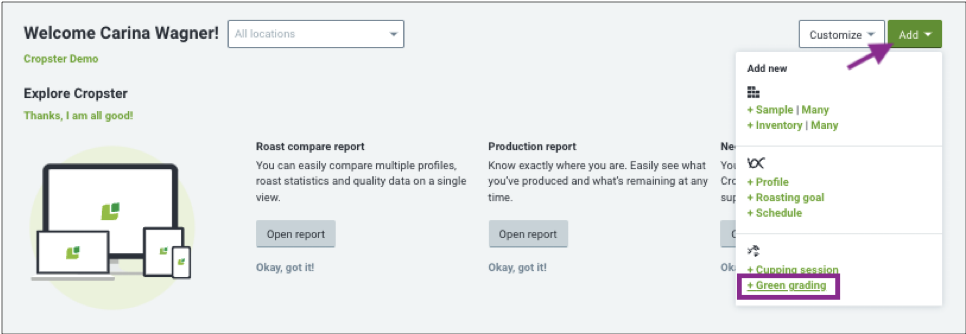
Via the Dashboard
- Log into the online platform C-sar.
- Click + Add on your Dashboard.
- Select + Green Grading to set up a Physical Analysis.
Setting up a Physical analysis
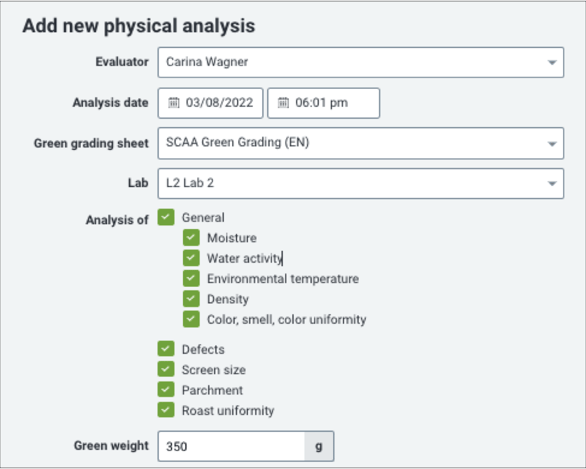
- Set up the session:
- Evaluator: Will be pre-filled with the user logged in.
- Lab: Select the Lab.
- Analysis of: Check the box next to the information you want to track.
- Green weight: Enter the lot's weight.
- Samples: Enter the samples name or ID-tag in the Quick finder to add them to your session or click + Advanced sample search to look for your samples via the table.
- To speed up things, the table is limited to only show lots and samples registered within the last month. Simply adjust the registration date filter if you cannot find your desired lot. (1)
- You can also change the order of the samples/lots on the table by dragging-and-dropping the selected lots into the right order. (2)
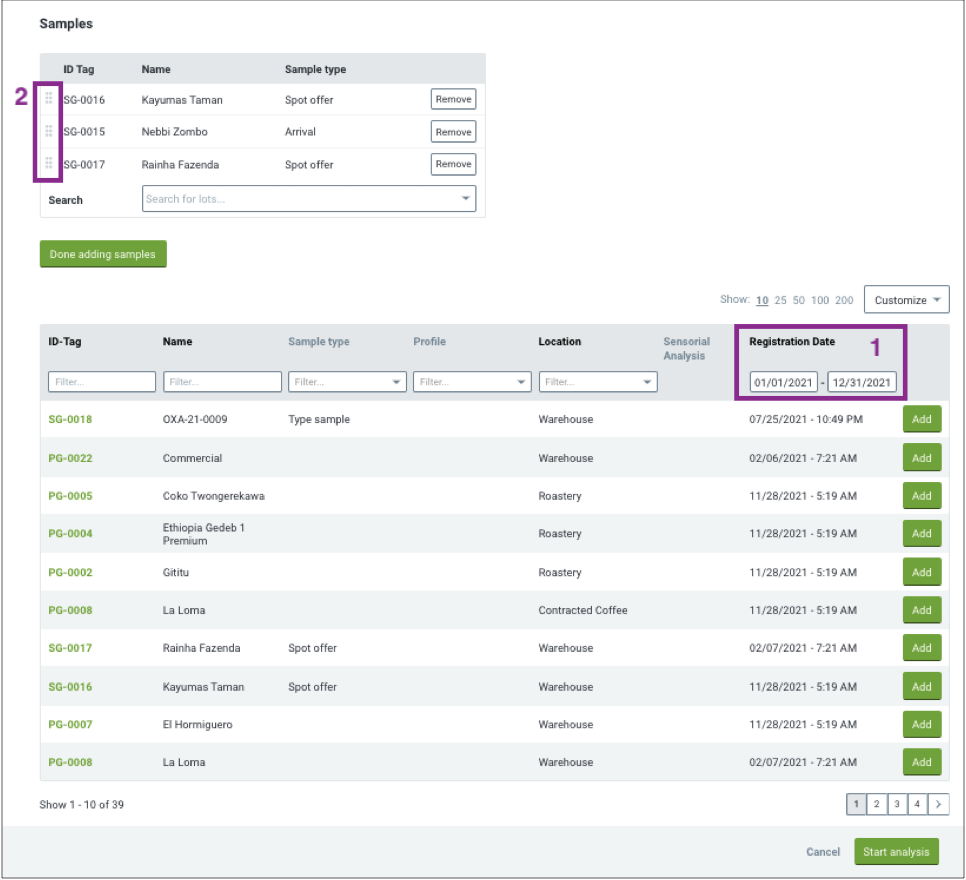
- Click Start Analysis.
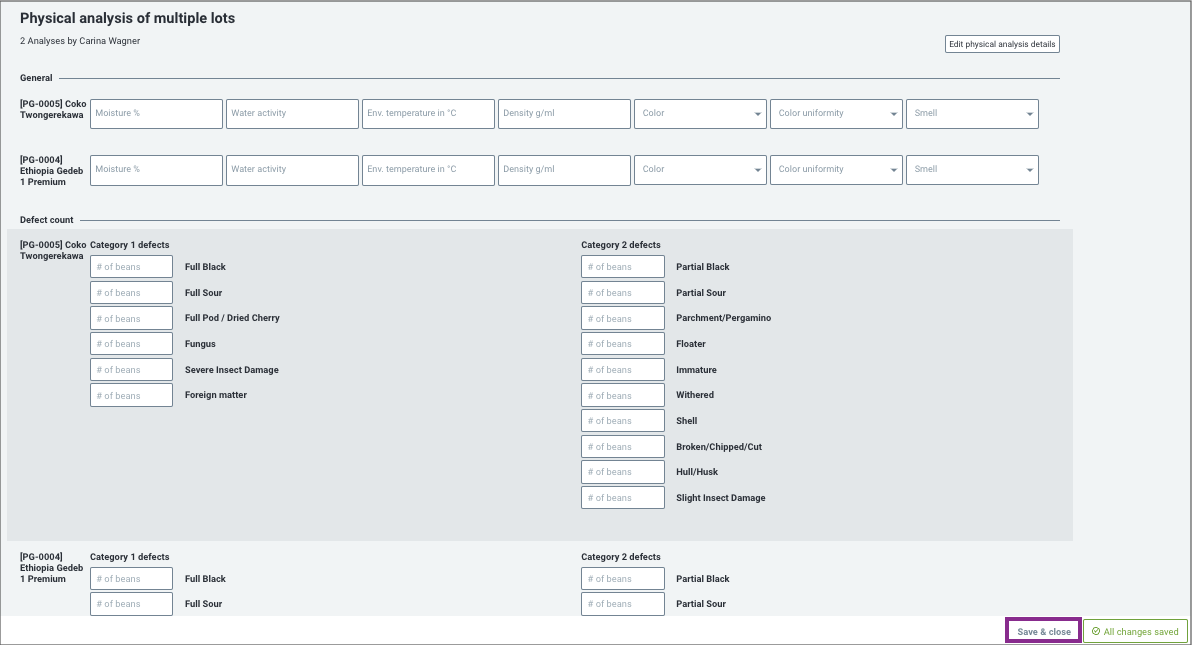
- Fill in the information you analyzed and click Save analysis.
You don't have to complete all fields. - Once you are done, click the Save & close button.
Reviewing the Green Grading information
The Green Grading information can be found:
In the Physical analysis section
The green grading information of every lot can be found in the Physical analysis overview (Quality > Physical) section under a unique QC-number. 
- Click the Customize button and choose what information to be shown in the overview.
- Use Filters at the top of the table to look for certain information, e.g. "all green grading information entered in the last 7 days".
- Export the data by checking the box at the left hand side of the table. A menu at the top of the table appears where you can choose the format of your export.
- Edit your data by clicking the Pen symbol in the menu bar at the top of the table.
In the lot's detail page
When you click on the ID-tag (PG- or SG-number) of your green beans, you will be lead to the lot's detail page.
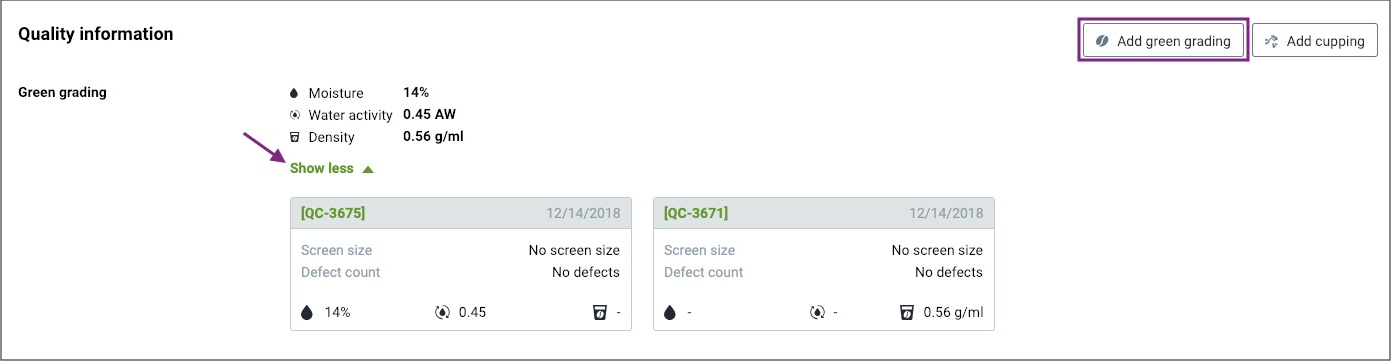
- Scroll down to Quality Information section to see the Green Grading information of the lot in question.
- Click Show more to see more detailed information on the different tests conducted.
- If you want to add information, click Add green grading.
Congratulations! You are now ready to add Green Grading information.
Your opinion matters. If you have further questions, feedback, or concerns, please feel free to reach out by submitting a support ticket directly from support.cropster.com.